Terminal
Looks like a tool, not a toy
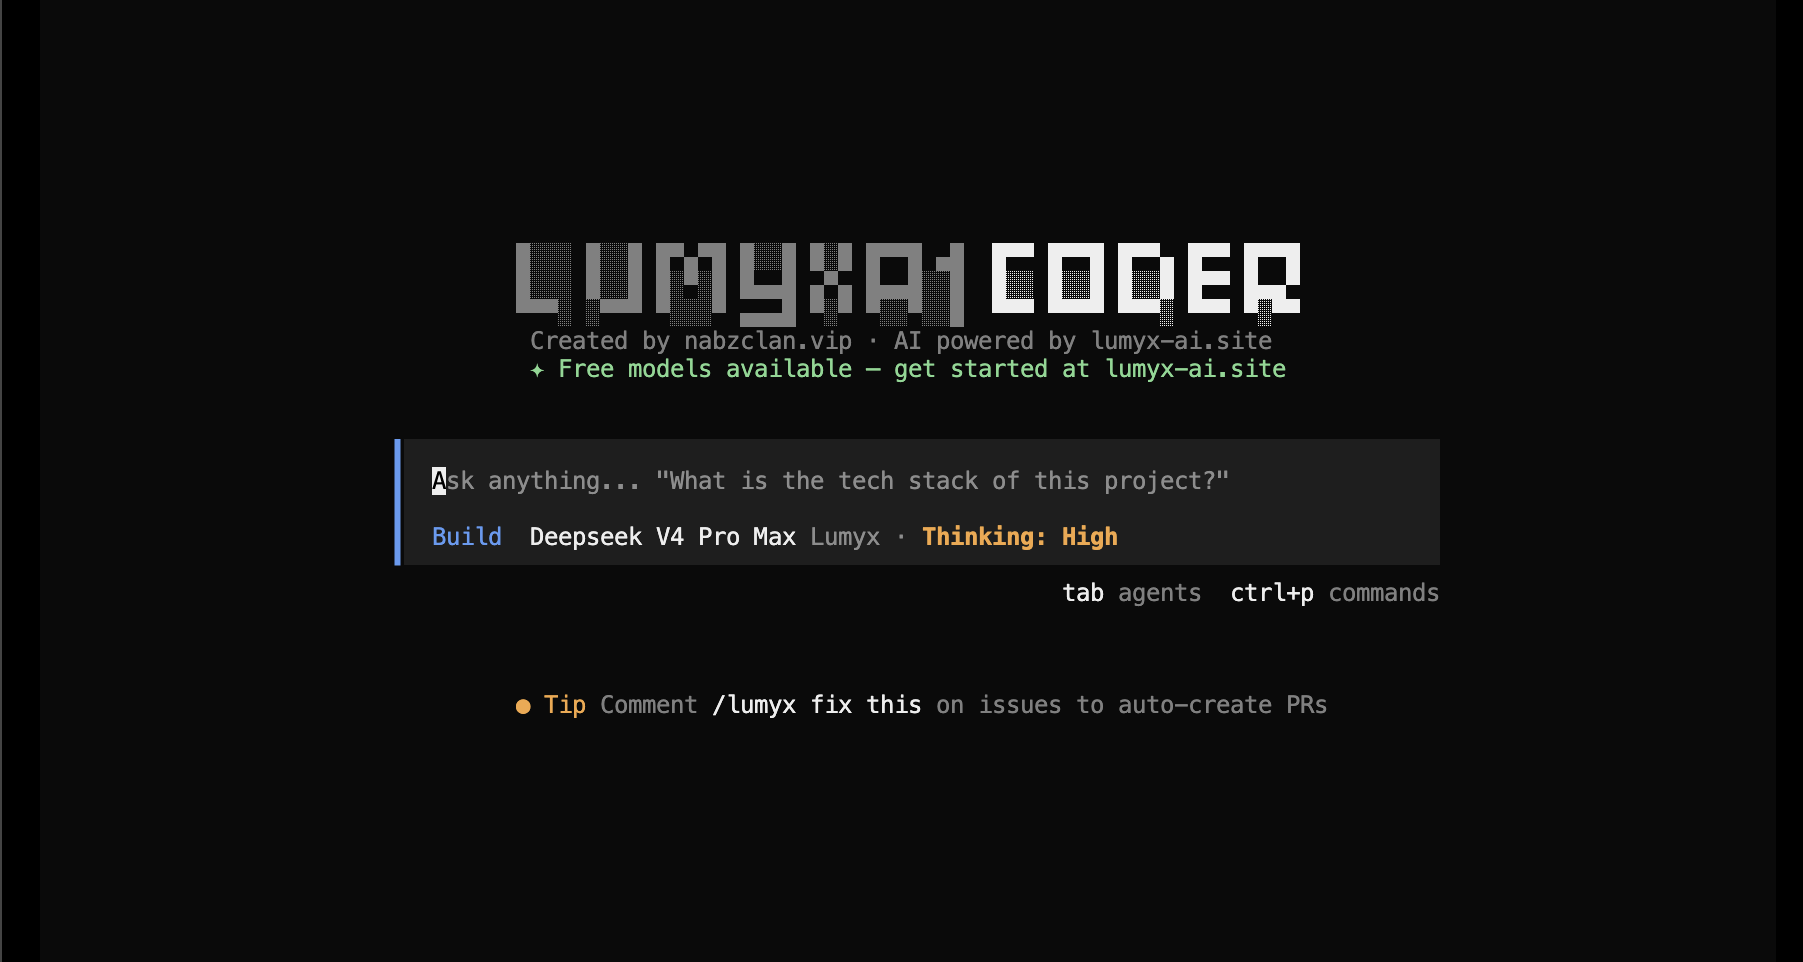
Lumyx CLI in action — interactive file inspection, diffs, and model selection
Why use it
Made for daily repo work
Use it when browser chat gets in the way. Lumyx stays close to files, branches, commands, and token costs — all through your LumyxAI API key.
Built for terminal work
Open a repo with `lumyx`, ask for a change, review diffs, and keep moving without leaving your shell.
Scriptable when needed
Use `lumyx run "fix the auth bug"` for repeatable tasks, CI jobs, release checks, or quick one-off edits.
Powered by LumyxAI
All requests go through the LumyxAI platform. Manage credits, track usage, and access 30+ models from one API key — no third-party keys needed.
Bring your tools
Register MCP servers with `lumyx mcp add` so Lumyx can reach docs, databases, APIs, and internal tools.
PRs from shell
`lumyx pr 42` fetches the branch, checks it out, and opens a focused session on that change set.
Costs stay visible
`lumyx stats` shows token use, model cost, and project spend before small experiments turn expensive.
Local server mode
Run `lumyx serve` for headless work, `lumyx web` for browser review, or `lumyx attach <url>` from another machine.
Sessions survive
Resume old work with `--continue`, fork a new path with `--fork`, or export a session when you need a record.
Reference
Essential commands
lumyx [project]Open interactive mode in project directorylumyx run [message]Run a single task and get a patch backlumyx configSet API key, default model, and preferenceslumyx modelsList all available LumyxAI models with pricinglumyx statsShow token usage and credit spend by modellumyx sessionManage sessions — list, resume, fork, exportlumyx pr <number>Check out a GitHub PR and start a reviewlumyx mcp addRegister an MCP server for tools and datalumyx webOpen the local browser review UIlumyx serveStart headless HTTP server for remote accesslumyx upgradeUpgrade to the latest CLI releaseStart
Install, auth, run
Install
Install binary and add it to your PATH.
curl -fsSL https://lumyx-ai.site/cli/install.sh | bashAdd your API key
Create an API key from the LumyxAI dashboard and configure the CLI.
lumyx auth login
# Enter your LumyxAI API key when promptedWork in repo
Start interactive mode, or send one task and get a patch back.
# Interactive TUI
lumyx

# One-shot task
lumyx run "find why login returns 500 and patch it"